|
Precision Disk Brake Rotor Truing |
 |
For the mountain biker who needs perfect performance from
equipment that's regularly subjected to high stresses, heat, and crashes:
the ultimate rotor truing (and wheel truing) system.
With a wheel survey gauge tool, you can true a rotor or rim to within a
paper's width of perfect. A true rotor gives true, predictable braking. |
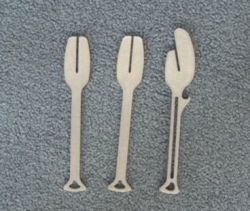 |
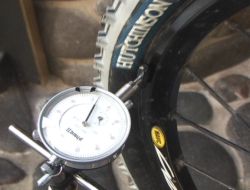
We got this system from Morningstar Tooling Products. The
truing gauge (above) is the R2.O.C-TECH ("Rotors
and Rims On
Center") wheel survey tool. The
truing levers are Drumstix rotor truing forks.
(Note: I haven't found a
good use for the small "beer-bottle opener" hook on the side of
the bending tool. I suspect it's just what appears to be: a beer bottle
opener.)
On this page, I'll show you the right way to true the rotor. For a
quick-n-dirty method using a crescent wrench (sorta works, and lets you keep
biking when you're away from the shop), click here. |
| First, decide if you should replace the rotor. If it shows
a stress or "fold" line, chuck it! Feel the surface to see if
it's concave (lost metal in the middle of the rotor), or has other signs
of severe wear. File off any burrs and rough spots. |
| Installing the Wheel Survey Tool |
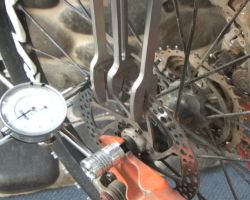
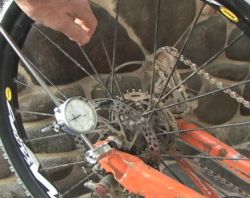
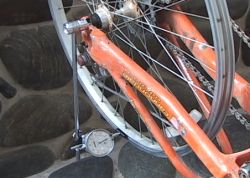
| Turn your bike upside down. To install the wheel survey
tool, leave your wheel in the dropouts, but pull your skewer. Turn the
skewer so the threaded end is on the brake rotor side. Now twist the
skewer into the receiver of the wheel survey tool and lock it down with
the quick-release. |
 |
Make sure the indicator tip can "play" back and
forth completely without hitting the end of its travel. Turn the indicator
tip so it lies radially over the rotor's grip surface, flat on the metal.
This is the best position to detect all warps and bends. A
circumferential orientation (the black tip lies along the direction of
rotation) can detect the most common type of heat-warping. |
 |
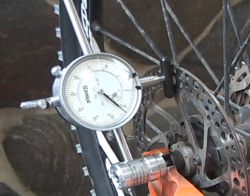
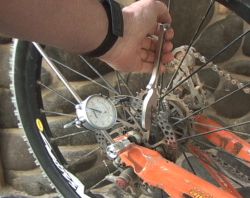
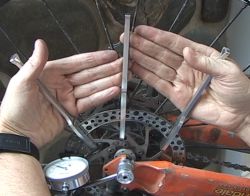
Turn the wheel gently. The needle of the gauge will move
with the warp of the rotor. When you see the needle deviate, identify
three spots:
1. where the motion starts
2. the point of maximum excursion
3. where the deviation ends
These are the spots where you'll apply your tools. |
 |
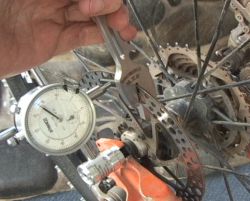
Note the needle motion on this rotor in just 1/8 turn of
the wheel. This rotor is only 6 months old, and passes the
"eyeball" test for being perfectly straight. (The eyeball test
is watching the distance between pad and rotor as the wheel turns).
Any warp of the rotor decreases braking response and
efficiency. |
 |
The best method for straightening the rotor is by using all
three tools (Drumstix) as shown below. But often a slow, gentle warp (such
as sometimes occurs during a flaming long downhill when the rotor begins
to smoke) can be straightened by using the bending tool alone.
Here the long end of the bending tool is against a support strut. This
corrects a "taco" type bend that involves a strut. |
 |
Here we're using the smaller side of the bending tool
between the struts. This corrects a minor localized "tilt" type bend.
|
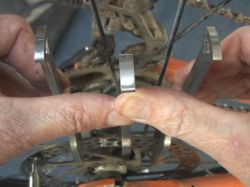 |
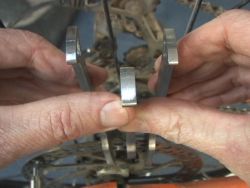
Outward bends and warps, three-tool method:
Find the spot where the rotor begins to bend outward, the spot of maximum
deviation, and the spot where it returns. Put a stabilizing tool on the
beginning and end-point of the bend. Put the bending tool in the middle of
the curve, at the point of maximum deviation. Apply it so the tool leans outward.
Hold the outer (stabilizing) tools with your fingers while you push
inwards on the bending tool with your thumbs as shown. |
 |
The bend will often rebound back a bit. Test the truing, and
reapply the tools and correct as needed.
Many bends require a second application of bending with the tools
closer together, as the original long curve becomes a short curve. |
 |
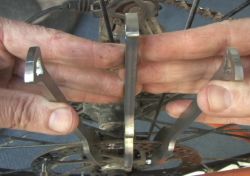
Inward bends and warps, three-tool method:
Again, find the spot where the bend begins, the spot of maximum deviation,
and the spot where it ends. Apply the stabilizing tools on the beginning
and end-point of the bend. Put the bending tool at the point of maximum
deviation, turned so the tool leans inward.
For a widespread warp (the most common kind) put the stabilizing tools
in the fold of your thumb while pulling back with your fingers on the
bending tool. |
 |
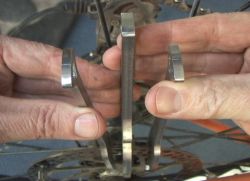
Hook the outer (stabilizing) tools with your thumbs while you pull back
on the bending tool with your fingers as shown.
This view shows correction of a smaller bend, such as might occur from
the rotor hitting a rock. |
 |
Tweak and reapply the bending force as necessary. If a smaller curve remains after making the major correction, move the
stabilizers inward and repeat. |
| Truing your rim precisely for rim brakes |
 |
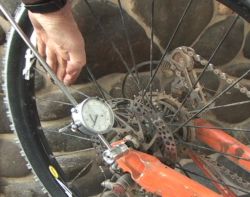
Got rim brakes? Imagine how much better your brakes can
perform if your rim is trued to within a paper's width of perfect.
By sliding the gauge out to your rim and moving the gauge-attachment
rod so the indicator tip lies on your rim, you have a precise rim-truing
gauge. |
 |
You can test the true of your rim with the tire on. But when
it comes to actually truing the wheel, you should remove the tire from the
rim to adjust the spokes.
After truing, remount the tire and test for true again. (A damaged tire
can sometimes force a rim out-of-true when the tube is inflated.)
|
[Fix-it Index Page]
|


